Preparing the image digitally
After a few initial pencil sketches the image is scanned and then prepared digitally using image processing software. The reference material I use is either public domain photos found online or ones that I have taken specifically for each project in mind. I use simple brushes to create the vector-like layers to simulate the actual reduction method. I generally try and keep my layers at minimum numbers while at the same time maintaining a high, as possible, level of richness and complexity in my image.
Transfering the image
Once I am satisfied with my digital image and have a clear understanding of the layering sequence, I will print it out and carbon trace most of the image on a prepared piece of lino. I will then usually fortify my lines with ink and fill in the rest of the layers with different coloured pens.
Carving the lino block
Once I have finished transfering the image to my piece of lino, it is time to carve out the parts that I do not want to print at any stage of my printing process. I use sharp cutting tools identical to those used for woodwork to do my carving and always try and maintain them as sharp as possible. The carving process can be a long, tiring and sometimes tedious one, but I mostly enjoy it.
This stage is repeated multiple times during the creation of a print.
Inking
As I do not have the space and equipment to do my printmaking at home, I am a member of Edinburgh Printmakers and use their facilities to do all the printing.
Oil based ink is mixed on a glass surface, and great care is taken to achieve the right colour and ink consistency for each layer about to be printed. The ink is then rolled out on a similar surface and then onto the carved out piece of lino itself.
Printing on the press
The inked up piece of lino is then placed on a registration jig and a piece of paper in laid on top of it. All of this is then covered with a piece of perspex and then a couple of felt blankets. I then slide it under a hydraulic platten press and apply large amounts of pressure with the attached hand pump.
The jig is then removed from the press, the print is peeled off the block and laid down to dry on a drying rack.
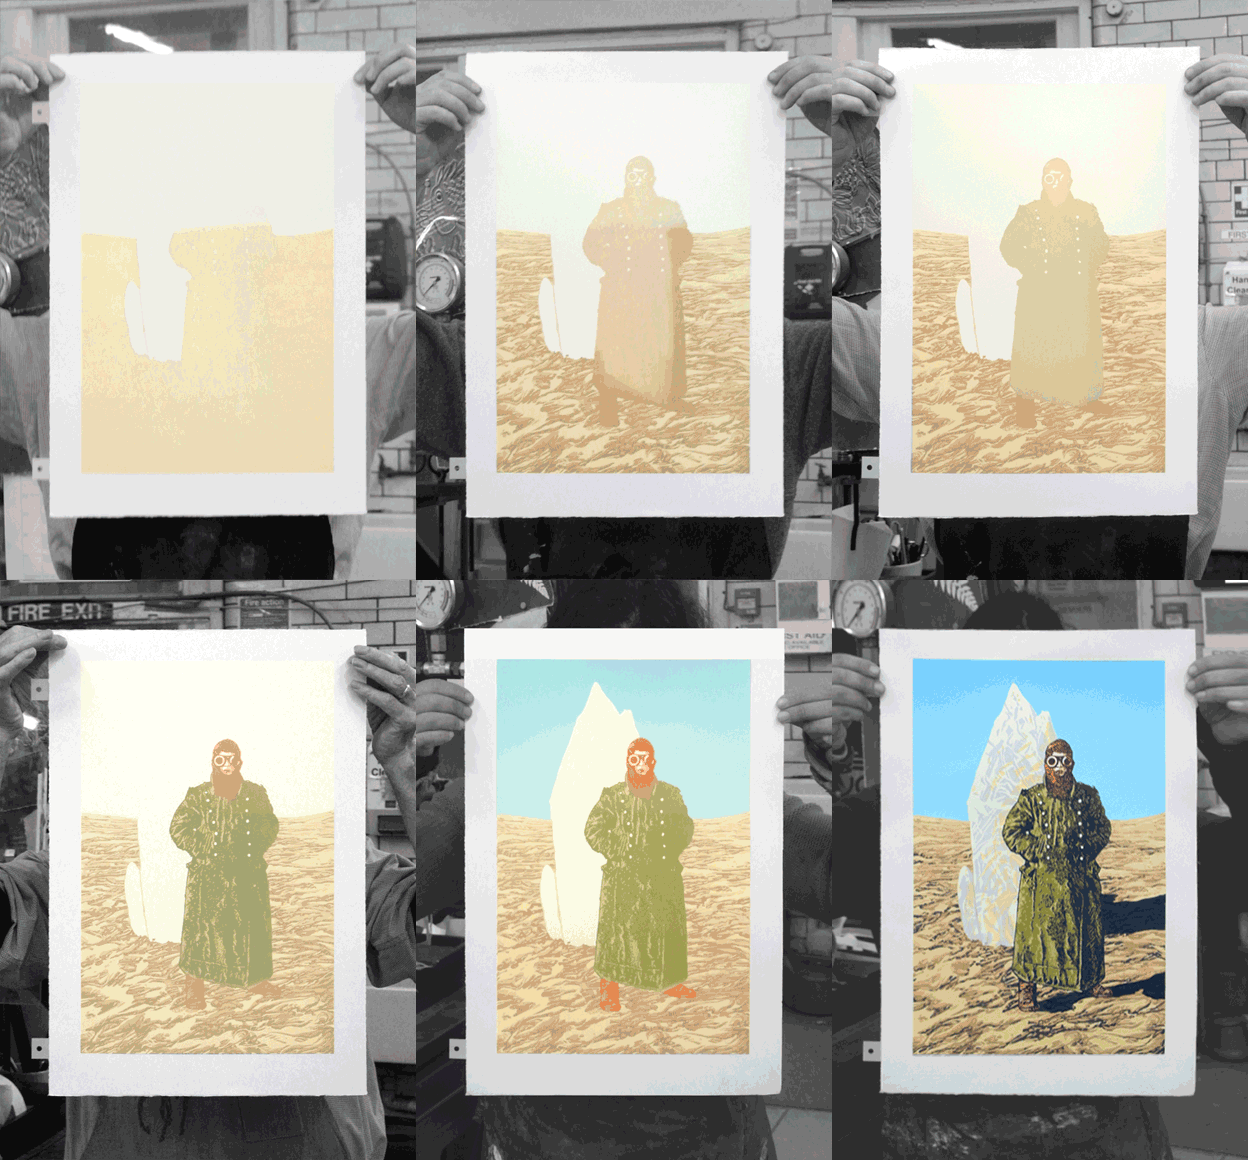
If I am doing a 10 layer print with an edition of 25, I will have to use the press a minimum of 250 times. Thankfully the ink of each layer needs to dry for a couple of days, thus spreading out the labour significantly
Rinse and repeat
I will start my linocut by printing the lightest colour and then slowly work my way to the darkest one, in most cases a black or off-black. Between each printing, I will have to remove those parts of lino that were used to print the previous layer and allow for adequate drying of the ink.
Once the print is finally finished and the last layer is bone dry, I will then trim the paper if necessary and finally number, title and sign each print with a pencil. They will then all be safely stored until sold.
My editions never exceed 50 copies and have not fallen below 5. The artist tends to keep a certain number of prints which are called artist proofs (AP) and these can be sold or kept.


